I found an antique dresser that I literally began dreaming about.
I thought about it for months,
& when my birthday rolled around,
Ta Da!
The dresser of my dreams!
Then there was the dilemma:
Paint it? Leave it? Lacquer it?
I finally decided to paint it.
At first I thought I would do a shabby-chic type thing
& paint it distressed white.
So after the [lengthy & torturous] process of paint-stripping & sanding,
my very talented uncle agreed to help me paint:
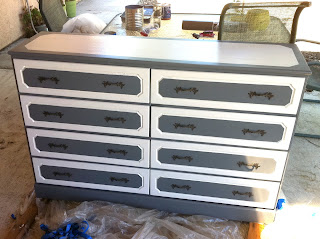
But then, I decided that I wanted my dresser to look like this instead:
The hard part being the precision.
I tried painting the white on the drawers over & over,
....& failed, over & over...
Until my lovely sister gave me painters tape!!
[Duh!]
[Duh!]
Let me tell you, it saved my life!
& I ended up with this beauty:
[this was me showing it off at my going-away party, hehe]
Here are a couple more views:
look at the perfection of those drawers!
I even got all fancy with the top!
painter tape is awesome....
DIY Dresser Restoration
Total cost: $40
Dresser: Gifted [Thanks J&J!]
Paint stripper: $9 [local hardware store]
Primer: $9 [local hardware store]
Electric sander: Borrowed
Brushes & paint: $20 [Lowes]
plus some frustration and hard work,
& I have the most amazing dresser EVER!
xox
DIY Dresser Restoration
Total cost: $40
Dresser: Gifted [Thanks J&J!]
Paint stripper: $9 [local hardware store]
Primer: $9 [local hardware store]
Electric sander: Borrowed
Brushes & paint: $20 [Lowes]
plus some frustration and hard work,
& I have the most amazing dresser EVER!
xox


You're an inspiration of stuff-doing.
ReplyDeleteAlso, great job on the dresser.
This looks amazing!! I want one!
ReplyDelete